Create your own Cookiecutter template
Are you doing the same steps over and over again every time you start a new programming project? More particularly when creating an application that a features a test suite along with auto-generated documentation? A package that you later want to publish on PyPI?
If so, you should definitely check out Cookiecutter! 😉
Cookiecutter is a cross-platform command-line utility that creates projects from project templates. E.g. Python package projects, jQuery plugin projects. It prompts users for input and uses the given information to render templates.
There are numerous cookiecutter templates available online including a fully-fledged PyPackage template by the original creator of Cookiecutter @audreyr herself.
The goal of this series of blog posts is to give an example for creating your very own template. The resulting project will be a fully functional Kivy app, ready to be deployed to your android mobile device.
I am using Python 2.7 on Ubuntu 14.04 (Trusty Tahr) 64-bit but it should work with slight adaptations on your OS of choice. Please note that albeit Kivy being cross-platform the tool at hand for creating the apk named Buildozer is not, from what I know. It is in early development stage and only supports Linux at the time of this writing. For debugging purposes feel free to check out the Kivy Launcher on the Google play store.
Install Cookiecutter
Given that you have pip installed you can run the following:
$ pip install --user cookiecutter
Please see the official cookiecutter docs for more information on how to set up Cookiecutter.
Create a new cookiecutter template project
GitHub repository
Cookiecutter is capable of deadling with remote templates, which is why I tend to create a new GitHub repository and initialize it with a LICENSE and .gitignore file.
See cookiedozer 😄
Local directory
If you prefer to create a local directory instead, that’s fine too. Cookiecutter does not require templates to be git repositories.
$ mkdir cookiedozer
Project structure
After successfully cloning the template repository, you should find the following folder structure:
$ cd cookiedozer
$ tree -a -L 1
.
├── .git
├── .gitignore
├── LICENSE
└── README.md
If you prefer reStructuredText over markdown for your README file, you can rename the file created by GitHub for you and convert the syntax if need be. Then git commit your changes.
$ git mv README.md README.rst
$ git commit -m "Convert README.md to rst format"
Please note that I will leave out git commands for the rest of this post for the sake of brevity. However I would like to encourage you to commit sets of changes as you go.
Template structure
Cookiecutter uses jinja2 under the hood to render templates. The syntax will probably look familiar if you have worked on Flask or Django projects before.
The idea is to generate text from so called context variables:
{{cookiecutter.repo_name}}
Create Python package
You need to create two nested folders. One will be the project root and the other one is the Python package root containing the application code.
$ mkdir -p {{cookiecutter.repo_name}}/{{cookiecutter.repo_name}}
Next we want to create the compulsory __init__.py to have a package as well
as a module for our application:
$ cd \{\{cookiecutter.repo_name\}\}/\{\{cookiecutter.repo_name\}\}/
$ touch __init__.py
$ touch {{cookiecutter.repo_name}}.py
It is recommended to set the encoding to utf-8 for both of the files and insert
meta data into __init__.py:
# -*- coding: utf-8 -*-

__author__ = '{{cookiecutter.full_name}}'
__email__ = '{{cookiecutter.email}}'
__version__ = '{{cookiecutter.version}}'
Context file
We need to register variables that we want to use in a JSON file with name
cookiecutter.json at the top level of your template. In its most basic form
it contains a number of key-value pairs, that refer to variable names and
default values for these variables.
$ touch cookiecutter.json
{
    "full_name": "Raphael Pierzina",
    "email": "[email protected]",
    "repo_name": "helloworld",
    "version": "0.1.0"
}
Kivy app
Kivy is an open source Python framework for rapid development of cross-platform applications with natural user interfaces (NUI). Kivy runs on Linux, Windows, OS X, Android and iOS.
A basic kivy app
Let’s edit the previously created Python file {{cookiecutter.repo_name}}.py and
start off with a basic setup.
We need to have an additional cookiecutter variable for our app as PEP8 recommends a CamelCase class name while the repository and package is supposed to have an all lowercase name.
Please note the variable kivy_version which is mandatory for a kivy app.
Your kivy installation must be of this version or higher, so that features your
app build on top of are available and the app is working as expected. For any
additional information concerning this please visit the official
Kivy API docs.
Entrypoint
It is common practice for Kivy apps to have a main.py module to launch the
application:
#!/usr/bin/env python
# -*- coding: utf-8 -*-

from {{cookiecutter.repo_name}} import {{cookiecutter.app_class_name}}


def main():
    {{cookiecutter.app_class_name}}().run()


if __name__ == '__main__':
    main()
GUI code
Kivy has its own DSL for defining GUIs named kvlang, which lets you define user interface components in a declarative way. We use a separate file to
Create a new file:
$ touch {{cookiecutter.app_class_name}}.kv
Paste the following into the file:
#:kivy {{cookiecutter.kivy_version}}

Button:
    text: '{{cookiecutter.app_title}}'
Learn more about the syntax of a kvlang file here.
There a several ways in which a Kivy app can load kvlang files:
- By explicitly calling the Builder and passing the desired kv file to it
- By using the application name in lower-case without
Appat the end for your kv file
We will use the latter for now to demonstrate cookiecutter hooks.
Cookiecutter hooks
You can have Python or Shell scripts that run before and/or after your project
is generated. Create a hooks folder at the top level of your template
project and create a new Python file.
$ cd ../..
$ mkdir hooks
$ touch hooks/post_gen_project.py
The following code renames the kv file after the project has been generated to
follow the convention mentioned above, so HelloWorldApp.kv becomes
helloworld.kv. Although the kivy source code itself accepts a kv file ending
with either App or app, I encourage you to stick to the docs. Hence our
post generation script closely resembles the original implementation of
App.load_kv() at kivy/app.py.
#!/usr/bin/env python
# -*- coding: utf-8 -*-

"""Rename the generated kv file to be compatible with the
original kivy kv file detection of `App.load_kv()`.
"""

import os


package_dir = '{{cookiecutter.repo_name}}'
old_kv_file = os.path.join(package_dir, '{{cookiecutter.app_class_name}}.kv')

lower_app_class_name = '{{cookiecutter.app_class_name}}'.lower()

if (lower_app_class_name.endswith('app')):
    lower_app_class_name = lower_app_class_name[:-3]

new_kv_file = os.path.join(package_dir, '{}.kv'.format(lower_app_class_name))

os.rename(old_kv_file, new_kv_file)
LICENSE file
If you want others to be able to use your source code, you should add a LICENSE file. I chose the MIT License for this template and I want to use the same file for the project that cookiecutter will render.
Copy the license file to the root of the project.
$ cp LICENSE \{\{cookiecutter.repo_name\}\}/
After that we need to replace the current values by cookiecutter variables, so the beginning of the licence file should read as follows:
The MIT License (MIT)

Copyright (c) {{cookiecutter.year}} {{cookiecutter.full_name}}
README file
Create a new file:
$ touch \{\{cookiecutter.repo_name\}\}/README.rst
{{cookiecutter.app_title}}
==========================

{{cookiecutter.short_description}}

----

This `Kivy`_ app was generated with `Cookiecutter`_ along with `@hackebrot`_'s
`Cookiedozer`_ template.

.. _`Kivy`: https://github.com/kivy/kivy
.. _`Cookiecutter`: https://github.com/audreyr/cookiecutter
.. _`@hackebrot`: https://github.com/hackebrot
.. _`Cookiedozer`: https://github.com/hackebrot/cookiedozer
Update context file
Since we introduced a couple of new variables, we need to update
cookiecutter.json. Default values for variables can be templated, so that
when a user is prompted for input default values for other variables update
automatically.
Feel free to try it yourself, see Templates in Context Values.
{
    "full_name": "Raphael Pierzina",
    "email": "[email protected]",
    "repo_name": "helloworld",
    "app_class_name": "HelloWorldApp",
    "app_title": "Hello World!",
    "short_description": "Simple app that features a gray button!",
    "version": "0.1.0",
    "kivy_version": "1.8.0",
    "year": "2015"
}
Run Cookiecutter
That’s it, we can execute Cookiecutter now and pass our template to it. 😄
$ cookiecutter cookiedozer
Launch the app
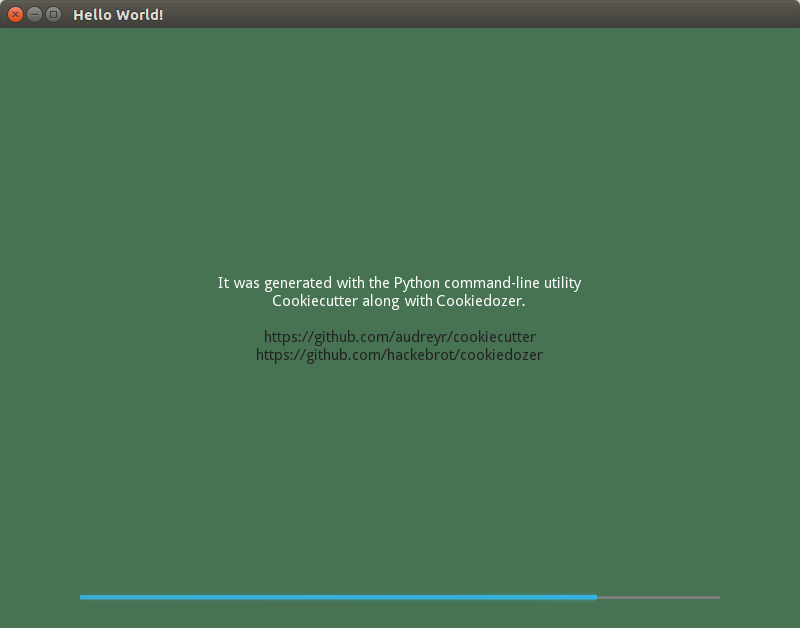
Now run the app with python from the package dir level.
$ cd helloworld/helloworld
$ python main.py
This should get you started with Kivy and Cookiecutter. In the next part of this tutorial we will be setting up tests, documentation as well as Builozer which we can use to deploy the app to an Android mobile device.
You can also always check out the latest version of the Cookiecutter template that we are creating on GitHub at https://github.com/hackebrot/cookiedozer.
It produces a visually appealing app, that features a sleek slide show displaying the passed values instead of a simple button. It has support for internationalization, links to be opened in your webbrowser as well as swipe gestures. Feel free to give it a try and let me know what you think! 😄